Monday, July 23, 2012

Chocolate Chip Cookies

My mom makes the best chocolate chip cookies in the universe. I know everyone says that, but in my case, it's true.  Chocolate chip cookies are adored by people of every age (for good reason), so when new neighbors moved in with young kids, I knew I had to bring over a batch.


The Best Chocolate Chip Cookies EVER
Makes about 30


Ingredients:


1 cup (2 sticks) unsalted butter
1 cup firmly packed light brown sugar
1 cup white sugar
1 tablespoon vanilla extract
1 egg
2-1/2 cups all-purpose flour
1 teaspoon baking soda
3/8 teaspoon salt
2-1/2 cups chocolate chips


Instructions:


Preheat oven to 350 degrees and line two baking sheets with parchment paper.
Whisk flour, baking soda, and salt in a medium bowl.
I weigh my flour. I've seen too many flat cookies; it's tragic.
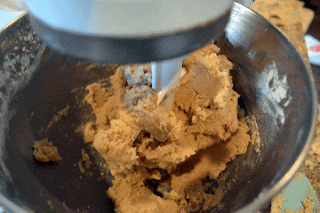
Cream butter with both sugars until blended.

Stir in vanilla and egg.

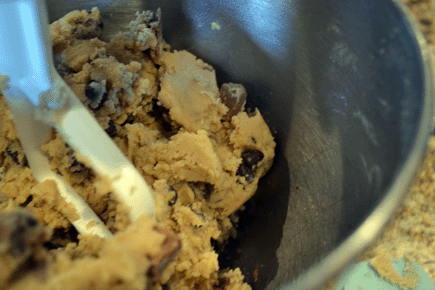
Mix in flour, baking soda, and salt all at once.

Once mixed, add chocolate chips.
I had to use some milk chocolate chunks.

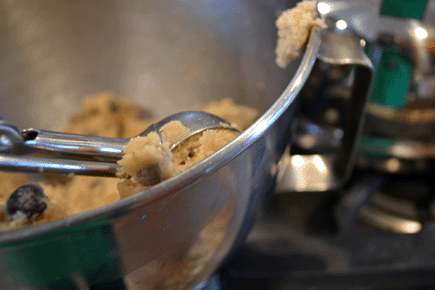
Form into spheres with a 1-1/2 inch ice cream scoop and place 2-3 inches apart on baking sheets.

Press down slightly. Bake one sheet at a time until light brown around edges, 13 to 16 minutes. (Don't overbake–they crisp up as they cool. They will seem a little underdone coming out of the oven.)

Store in airtight container at room temperature for one day, then freeze. (They're surprisingly good frozen, too.)


I love these cookies. The outsides are crispy and the insides are chewy and the chocolate chips are oh-so-gooey. (I'm a poet as well as a food blogger. Just kidding.) In addition to being amazing when baked, the batter tastes great as well. I can never resist grabbing a spoonful (or several) as I'm scooping the cookies.
I would have gotten 31 cookies...
It's a miracle that I haven't contracted salmonella yet. If it wasn't for the whole don't-eat-raw-eggs thing, I would just eat it from the bowl. However, the baked cookies are delicious... and much less hazardous.

Enjoy, new neighbors.

Saturday, July 21, 2012

Mango Lime Sorbet

Our new ice cream maker came the other day, and even though the books we ordered on ice cream making hadn't come yet, I couldn't wait. I found a recipe for mango sorbet online. Actually, I found several. And they're all the same. Every one. So to differentiate mine a little, I added lime zest.


Mango-Lime Sorbet (from every cooking site in existence)


Ingredients:


4 ripe mangos
1 cup sugar*
1 cup water**
3 tablespoons lime juice, plus more to taste
1/2 teaspoon lime zest (optional, but highly recommended)

*If your mangos are very ripe, reduce the sugar a little.
**Measure water in the dry measuring cup you used for the sugar; simple syrup has to be equal parts sugar and water.


Instructions:


Pour water and sugar into small saucepan over medium heat.

Stir until all the sugar has dissolved.

Allow to cool. Meanwhile, slice mangos into thirds.

Cut off skin of middle section and remove as much mango flesh as possible.

Cut lattice pattern into outer sections and turn inside out.
Make more cuts lengthwise.
Remove mango chunks.

Put mango chunks, lime juice and zest, and simple syrup in blender.

Pulse until smoothly pureéd.

Taste and add more lime juice if necessary. Chill in refrigerator for at least 6 hours, preferably overnight. Freeze in ice cream maker according to manufacturer's instructions. Serve or store in freezer.


This is such good sorbet! The lime and mango are perfectly balanced and create a zesty, yet sweet, sorbet. Since there's no cream, it freezes rock-solid in the freezer, but if you take it out about 10 minutes before serving, it softens to a scoopable texture. Just out of the ice cream maker, though, it's irresistible. My dad, resident ice cream fiend, loved it. The only problem is that I poured the pureé into the ice cream maker before starting it when I should have started it first.
This is what you get for not following the instructions.
I will definitely be making this again soon; it's the perfect, refreshing summer treat.

Wednesday, July 18, 2012

Simple Sauces Part 4–Tomato Sauce

Everyone needs a good all-purpose tomato sauce, one that can be used for everything from chicken parmesan to pizza to pasta. It needs to be easy to make and open to additions of vegetables, herbs, and meats.
This is that sauce.
It's kind of a miracle that this just happened to be the sauce because I kind of chose it arbitrarily, but whatever! It's a great tomato sauce.


Basic Tomato Sauce (from the side of bionaturae's Organic Strained Tomatoes):


Ingredients:


1 jar strained tomatoes (preferably organic, bionaturae recommended)
6 tablespoons extra-virgin olive oil
4 minced garlic cloves
4 teaspoons dried basil (or 8 fresh minced basil leaves)
Sea salt to taste


Instructions:


Place olive oil, minced garlic, and sea salt in a medium saucepan over medium heat and sauté until garlic is golden.

Pour strained tomatoes in and stir.

Simmer for 5-10 minutes.
I recommend not serving it with the slotted spoon.


As I mentioned before, this sauce lends itself to any occasion. You want to throw some chopped tomatoes in there? Sure.
You want to sauté onions and carrots with the garlic? Done.
Ground beef? Just toss it in (cooked, of course).
Chicken chunks? Go for it.
Anchovies? ...Maybe stick with chicken.

Even in its most basic form, this sauce is tasty. The organic tomatoes jibe perfectly with the garlic. The reason I love bionaturae's Organic Strained Tomatoes because the only ingredient is tomatoes. No additives or preservatives, just pureéd tomatoes. Their sauce recipe is insanely easy to prepare as well; it can be made in less than 15 minutes, perfect for those "Oh crap! I forgot to make a sauce for the pasta tonight!" moments.
Please pray for my grandfather. He is currently very ill in the hospital.